Topic: Train Simulator 2014 - RailWorks 5 26.09.13
4 posts, 6104 views-
- Razvan Mihai
-
Posted:
-
Train Simulator 2014 - RailWorks 5 26.09.13
Razvan Mihai
Train Simulator 2014: Your journey starts here!
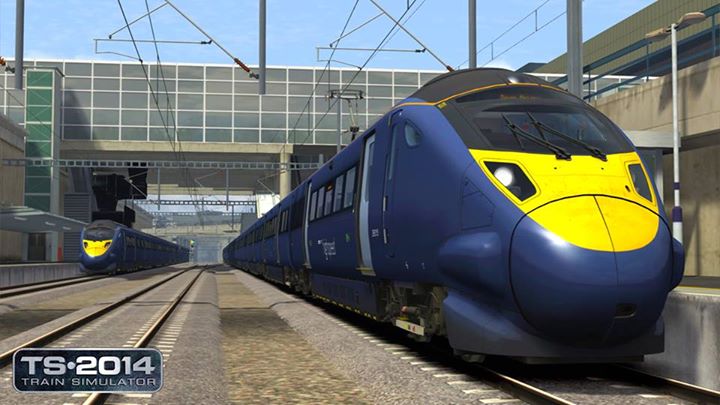
Drive, explore, create, collect – stunning graphics, real-world routes and challenging scenarios await in Train Simulator 2014, launching on 26th September 2013.
Embark on a fun and rewarding career as a train driver and take controls of a wide variety of trains, travelling iconic routes around the world, including the new Hamburg-Hanover route, London-Faversham High Speed and Donner Pass. Build and share your own exciting routes with Steam Workshop, download content created by other players, and create your own personal and customized collection with our extensive collection of add-on content.
Train Simulator 2014 brings you a new and intuitive user interface, an enhanced career mode and a number of graphical improvements. It will also be compatible with all previous add-ons purchased from Steam. Customers who already own Train Simulator 2013 will be automatically upgraded to TS2014 technology on 26th September.
Train Simulator 2014: your journey starts here.


Train Simulator 2014: Your journey starts here!
Drive, explore, create, collect – stunning graphics, real-world routes and challenging scenarios await in Train Simulator 2014, launching on 26th September 2013.
Embark on a fun and rewarding career as a train driver and take controls of a wide variety of trains, travelling iconic routes around the world, including the new Hamburg-Hanover route, London-Faversham High Speed and Donner Pass. Build and share your own exciting routes with Steam Workshop, download content created by other players, and create your own personal and customized collection with our extensive collection of add-on content.
Train Simulator 2014 brings you a new and intuitive user interface, an enhanced career mode and a number of graphical improvements. It will also be compatible with all previous add-ons purchased from Steam. Customers who already own Train Simulator 2013 will be automatically upgraded to TS2014 technology on 26th September.
Train Simulator 2014: your journey starts here.
1012256_10151550047333091_1102794580_n.jpg (42.71 KB; downloaded 5865 times)
943698_10151550048983091_83717368_n.jpg (59.09 KB; downloaded 5876 times)
942469_10151550051618091_1745708137_n.jpg (51.09 KB; downloaded 5864 times)
399186_10151550050693091_2011418746_n.jpg (57.12 KB; downloaded 5878 times)
-
- Razvan Mihai
-
Posted:
-
Re: Train Simulator 2014 - RailWorks 5
Razvan Mihai
Train Simulator 2014 Upgrade FAQ for existing users
Train Simulator 2014 is the very latest version of our award-winning Train Simulator series, offering you more features and higher quality than ever. As a valued Train Simulator user, we are going to give you a free upgrade to TS2014 technology on 26 September 2013. Read on to find out more!
I already own Train Simulator 2013. What will happen when Train Simulator 2014 launches?
Your software will be updated free of charge and will automatically download the first time you log into Steam after 26/9/2013. When you load TS2014, you will see the new user interface and new game features. However, please note that you will not see the three TS2014 routes and locos unless you have already purchased them.
How can I get the new TS2014 routes and locos?
The easiest and most cost effective way is to purchase TS2014: the new routes and locos will then be added to your Train Simulator add-ons.
What will happen if I already own the Donner Pass, London-Faversham High Speed or Hamburg-Hanover add-ons?
The Donner Pass, London-Faversham High Speed and Hamburg-Hanover add-ons in your game will be automatically upgraded to TS2014 specification, via an automatic download when you log into Steam after 26/9/2013.
If you have purchased Hamburg-Hanover before the 22nd August 2013 you will also receive the DB BR424 EMU add-on for free when TS2014 launches in September.
What will happen to my existing TS2013 add-ons?
Any add-ons you have downloaded from Steam will still be available for you to use. Although very unlikely, if you are worried that you have lost some of your purchased content you can verify your local files and make sure that you have all your add-ons.
What will happen to any third-party add-ons or self-created routes/assets?
We recommend that you back up all third-party and self-created items, including work in progress, by following these instructions:
If you are running the 32 bit version of Windows, the TS2013 files will be located at: Program files\Steam\Steamapps\common\railworks. Navigate to the appropriate directory and copy all of the files and sub directories to a suitable backup device or drive.
If you are running the 64 bit version of Windows, the files will be located at: Program files (x86)\Steam\Steamapps\common\railworks. Navigate to the appropriate directory and copy all of the files and sub directories to a suitable backup device or drive.
If you have any further concerns, please contact the third-party developer who supplied the add-on for more information.
Will the system requirements change when TS2014 is launched?
No. Even with the new features and graphical improvements, the system requirements for TS2014 will remain the same as those for TS2013.
Current system requirements are:
Windows® XP / Vista / 7 / 8
Processor: 2.8 GHz Core 2 Duo (3.2 GHz Core 2 Duo recommended), AMD Athlon MP (multiprocessor variant or comparable processors)
Memory: 2 GB RAM
Graphics: 512 MB with Pixel Shader 3.0 (AGP PCIe only)
DirectX®: 9.0c
Hard Drive: 6 GB HD space
What should I do if my Train Simulator will not work after the upgrade?
This is very unlikely but if you are unable to use Train Simulator 2014, email us at support@railsimulator.com with a description of the problem, screenshots and details of any error messages or symptoms, and our support team will investigate and offer advice on how to resolve it. The more information you provide, the more quickly we can assist you.
- See more at: http://www.engine-driver.com/2013/07/tr ... vcOS2.dpuf
1012256_10151550047333091_1102794580_n.jpg (42.71 KB; downloaded 5866 times)
-
- Razvan Mihai
-
Posted:
-
Re: Train Simulator 2014 - RailWorks 5 26.09.13
Razvan Mihai
New Developer Tools for TS2014: Gearing You Up for Workshop
If you have been following our blog you will be aware that for the first time in TS2014, users will be able to upload and share Train Simulator routes on Steam Workshop. We hope this is a feature which more and more of you will want to use, and to help you get to grips with route building, we have introduced some new tools to enable you to create great routes.
A major advance for route builders is the integration of Google Earth into the Train Simulator world editor. Those of you who have built routes will know what a challenge it can seem when you first begin, as a featureless green world sweeps away from you on all sides until you begin altering the terrain and adding track and scenic features. Google Earth integration gives you a head start by allowing you to easily overlay a Google Earth image of the location you are modelling directly onto the in-game terrain.
Beginning a new route – no assets placed yet
Simply press CTRL+G to instantly overlay Google Earth
In-game scenic assets can simply be placed directly over the Google Earth overlay
Once the image is in place, you can easily see where particular terrain and scenic features are and how they relate to one another in terms of distance and positioning. You can then use the editor in the usual way, and pick the required scenic items from the assets list and place them in the world directly where they appear in Google Earth.
The Google Earth overlay toggles on and off at any time with CTRL+G, and disappears altogether when you close the editor. You don’t even need to have Google Earth installed on your PC: it really is as simple as pressing CTRL+G wherever you are in the world and hey presto – the overlay appears on the ground before you. There are also settings enabling you to alter the transparency and resolution of the overlay, and the height of the overlay above the in-game terrain. This is a revolutionary new tool for route builders which is very simple to use and can speed up the route building process significantly, as well as enabling you to produce the kind of realistic and accurate routes you strive to make. And don’t forget, you will be able to share your routes on Steam Workshop. Users should be aware that using the Google Earth overlay will involve a data download, so please check if you have data restrictions on your internet connection.
Another major improvement for content developers is the new blueprint editor. The blueprint editor is an advanced tool which many Train Simulator users may never have cause to get to grips with – however, for those that use it, it was definitely time for an upgrade! The new blueprint editor has been built from scratch to be significantly faster than the old one, while offering a great deal more functionality. However, you should find that it remains familiar in terms of operation.
New blueprint editor with multiple tabs open and context-sensitive editing
The new blueprint editor features include:
Multi-Threaded exporting
Windowless Export Tools so that exports can run in the background while you get on with something else
Real time Directory Tree view that updates as files are added and removed externally – no need to refresh
Tabbed Document Interface allowing multiple files to be open at once
Copy/Paste/Delete File operations
Copy Absolute Blueprint IDs
Additional options for exporting
Advanced Editor View
Support for custom add-ins
Many previous limitations, such as maximum child objects, have been eliminated.
- See more at: http://www.engine-driver.com/2013/09/ne...okQRL.dpuf
http://www.engine-driver.com
-
- Razvan Mihai
-
Posted:
-
Re: Train Simulator 2014 - RailWorks 5 26.09.13
Razvan Mihai
How to use Google Maps in Train Simulator TS2014
The Google Maps Overlay is a very popular feature in TS2014. While it is very easy to use there are some fine tuning options that can really help you get the most out of it.This simple tutorial aims to demonstrate, step by step, how to begin the process of creating a route using the Google Maps Overlay.
Set up an API Key
This first step is optional but it is recommended by Google and will grant more data transfer per day from their mapping service. You will need a Google account to get a key, so if you haven’t got one of those yet, do that first.
Once you have an account. go to the Google API Console here.
Click the Create Project button. Note: If you have already done this before, you will be taken straight to the next menu and can choose from the services.
From the next screen, scroll down the long list of services until you find the “Static Maps API” service. Click this to toggle it ON, then read and review the terms and conditions. If you’re happy with these then click Accept.
From the menu on the left hand side you should now click the API Access menu option.
This screen shows a number of bits of information, the important one is in the “Simple API Access” section and is called “API Key” - it will show up as a long list of characters, symboles and numbers. This is the key that you need, select it and press CTRL+C to copy it in to your clipboard.
Start TS2014 and go to Settings followed by Graphical Settings. From here go to the new Google Map Overlay settings screen.
Click to enlarge
The top-most entry is for the Google Maps API Key. Click in this text field and press CTRL+V to paste the key in.
That’s it, you’re now set up with the API Key and you’re ready to move on to the next step.
Configuration of Google Maps Overlay
Click to enlarge
The remaining settings on the Google Maps Overlay settings screen will let you adjust how much detail is displayed, the more detail you want to display the more it will need to download.
Set the Google Maps Resolution to your preference, higher resolution data is of course preferred but 1280x1280 is four times bigger to download than 640x640 so I would suggest trying the lower resolution first to see if you get what you want.
The Map Type determines the type of image that will be displayed in the overlay. An example of each type of image is shown below (Road, Terrain, Satellite, Hybrid)
Zoom Level allows you to zoom in and get more detail, the valid range is 13-21 with 13 being the minimum amount of data and 21 being the maximum. Data for different parts of the world have different maximum zoom levels provided, if your zoom level is too high for the region you are in then you will get blank overlay tiles. In this case, keep lowering the value until you start getting mapping data. Generally 16-17 is quite well supported.
Increasing the zoom level also reduces the size of the overlay tiles which will make them conform to terrain better. There is of course a larger download required for the higher zoom levels.
Finally, Tiles Displayed controls the grid of data that will be downloaded surrounding the viewing camera. If you have used a high zoom level you may need to ask for more tiles to continue getting a reasonable coverage, if you are on a lower zoom level then you can ask for fewer tiles as each one is bigger.
You will likely find yourself back to this screen periodically to tune your settings for the region you are in or for the quality of internet connection you are using.
Now that you’ve set up the Google Maps Overlay, it’s time to build a route and see it in action.
Create a new Route
For this tutorial we are going to focus on Sheringham on the North Norfolk Railway.
World Coordinates come in a variety of formats, so it is important to make sure you’re using the right one for TS2014. The correct format to use is “Decimal Degrees”. If you’re using the Google Earth application to get our coordinates, you can change it to report these units by going to Tools, Options and change the “Show Lat/Long” setting to read “Decimal Degrees”.
For Sheringham, the Latitude is 52.941728 and the Longitude is 1.207392. I have obtained this from the Google Earth application very simply. For your route, find somewhere reasonably central to set as the origin and ensure that you have the Lat and Long for it.
Now we’re ready to build.
First, click the BUILD menu from the front screen.
Click to enlarge
From here, click New Route.
Click to enlarge
On this screen, select the route template that you would like to use to pick up the basic textures, track types and so forth. This will usually be the route that you have on your system that you feel most matches that style of route you want to create.
It is important that you select the ground texture set first and then enter your lat and long second as selecting the ground texture set will overwrite the lat and long with the default origin of the chosen route.
Enter the lat and long, pressing enter after each one.
Finally, click Create, enter the name of your route when asked and then click OK to get into the world editor.
Enable Google Maps Overlay
Once you’re in the world editor you can simply press CTRL+G to enable the Google Maps Overlay.
Fly around the route as normal and orient yourself, it’s easy when the world is placed underneath you!
You may find it necessary to re-enter the lat/long once in the world editor and then jump to that location. You can do this by opening the compass box at the top and entering the details (ensuring to press enter after each number is typed in) followed by clicking on the white triangle on the right hand side.
Tuning the Google Maps Overlay
When the overlay is enabled a new fly-out box appears on the bottom right, move the mouse over to it to slide it out and use it.
The first slider controls the opacity of the overlay. All the way to the left the overlay will be completely invisible, all the way to the right the overlay will completely block out the ground underneath. Often you will find the most comfortable setting somewhere in the middle but it depends on what you’re trying to do so it’s useful to be able to change it quickly while you’re editing.
The second slider height of the overlay above ground level. All the way to the left means lowest and all the way to the right means highest.
The pause and play buttons are used to pause streaming the data. If you are quickly trying to fly from one point of the route to another and don’t need the overlay you may find it quicker to pause the stream, get to where you’re going and then press play again to resume it, rather than have it try to download data you don’t want.
Now get building!
http://www.trainsimulatornews.com/2013/...train.html